Hasselback Sweet Potatoes take your everyday baked sweet potato to a whole new level. Each slice turns crisp and golden around the edges while staying soft and buttery inside. Brushed with garlic butter and roasted until tender, this simple Hasselback Sweet Potato recipe is the kind of side dish that always steals the spotlight.

- What Makes This Recipe So Good
- What Goes Into Hasselback Sweet Potatoes
- How To Make Hasselback Sweet Potatoes
- Tips For Making Hasselback Sweet Potatoes
- Recipe FAQ’s
- Hasselback Herbed Garlic Butter Sweet Potatoes Recipe
What Makes This Recipe So Good
These Hasselback Sweet Potatoes look fancy but couldn’t be easier to make. The thin slices help them bake faster while soaking up all that garlic butter flavor in every little crevice. They crisp beautifully on the outside yet stay creamy and tender on the inside, making them the perfect mix of texture and taste.
What people really love is how versatile they are. You can serve them with roasted meats, toss them into a holiday spread, or even enjoy one as a meal with your favorite toppings. Whether it’s a weeknight dinner or a festive feast, this Hasselback Sweet Potato recipe never disappoints.
What Goes Into Hasselback Sweet Potatoes
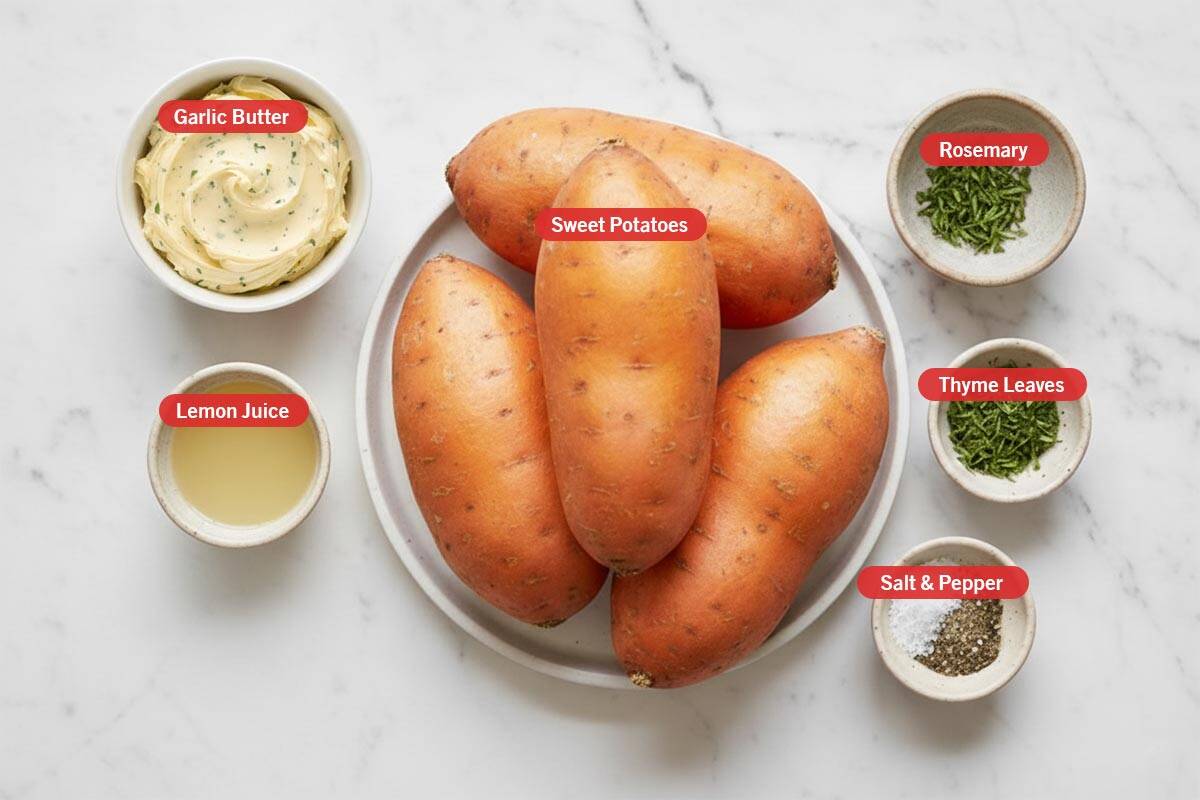
You only need a handful of simple, fresh ingredients to make these Hasselback Sweet Potatoes shine. The key is balancing sweetness, butter, and herbs for that golden, crispy finish.
- Sweet Potatoes: Choose medium-sized ones so they cook evenly and get that perfect mix of crispy edges and soft centers.
- Garlic Butter: Brings rich, savory flavor that melts beautifully between each slice. You can use homemade or store-bought for convenience.
- Fresh Herbs: Thyme and rosemary add a fragrant, earthy note that pairs perfectly with the natural sweetness of the potatoes.
- Lemon Juice: A small splash brightens up all the flavors, cutting through the richness and adding a touch of freshness.
Note: Please see recipe card at the bottom for a full list of ingredients with measurements.
How To Make Hasselback Sweet Potatoes
- Preheat the Oven: Set your oven to 220°C (425°F) and line a baking sheet with aluminum foil. This helps the sweet potatoes cook evenly and makes cleanup easy.
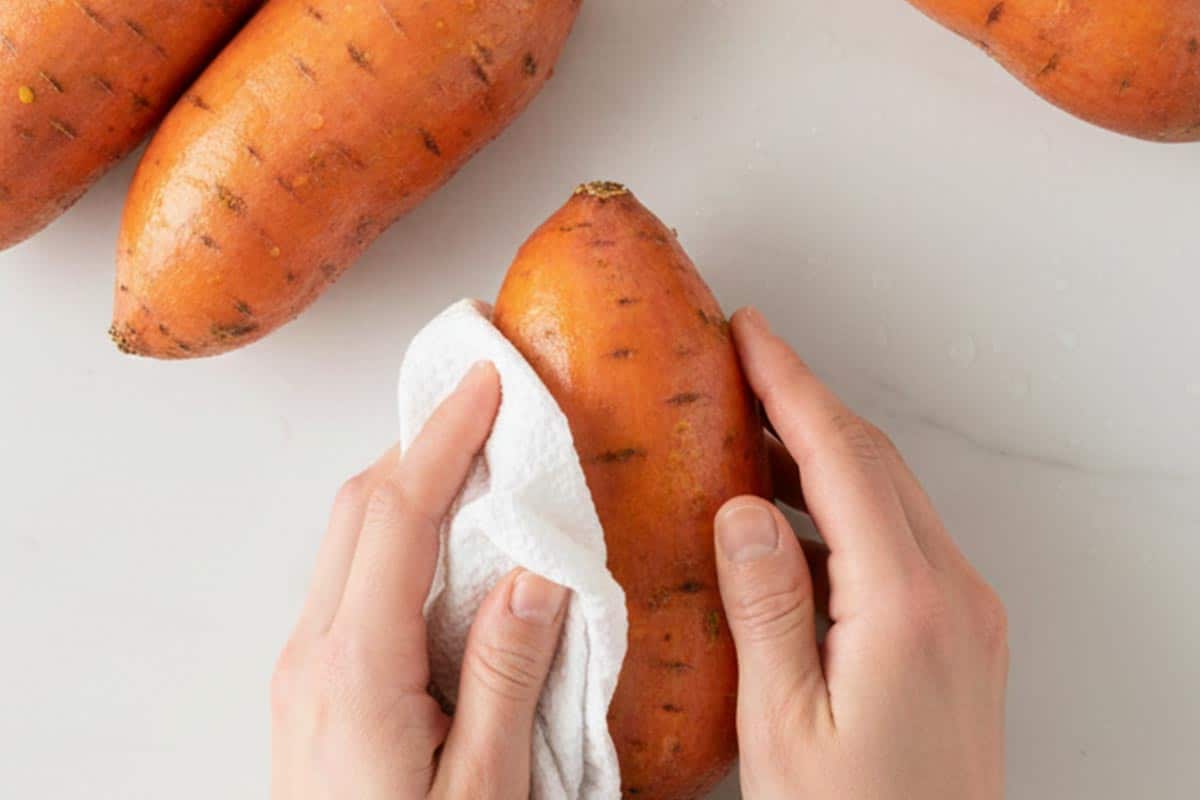
- Prepare the Sweet Potatoes: Wash and scrub each potato thoroughly, then pat dry with a paper towel. Clean skins help the slices crisp up beautifully.
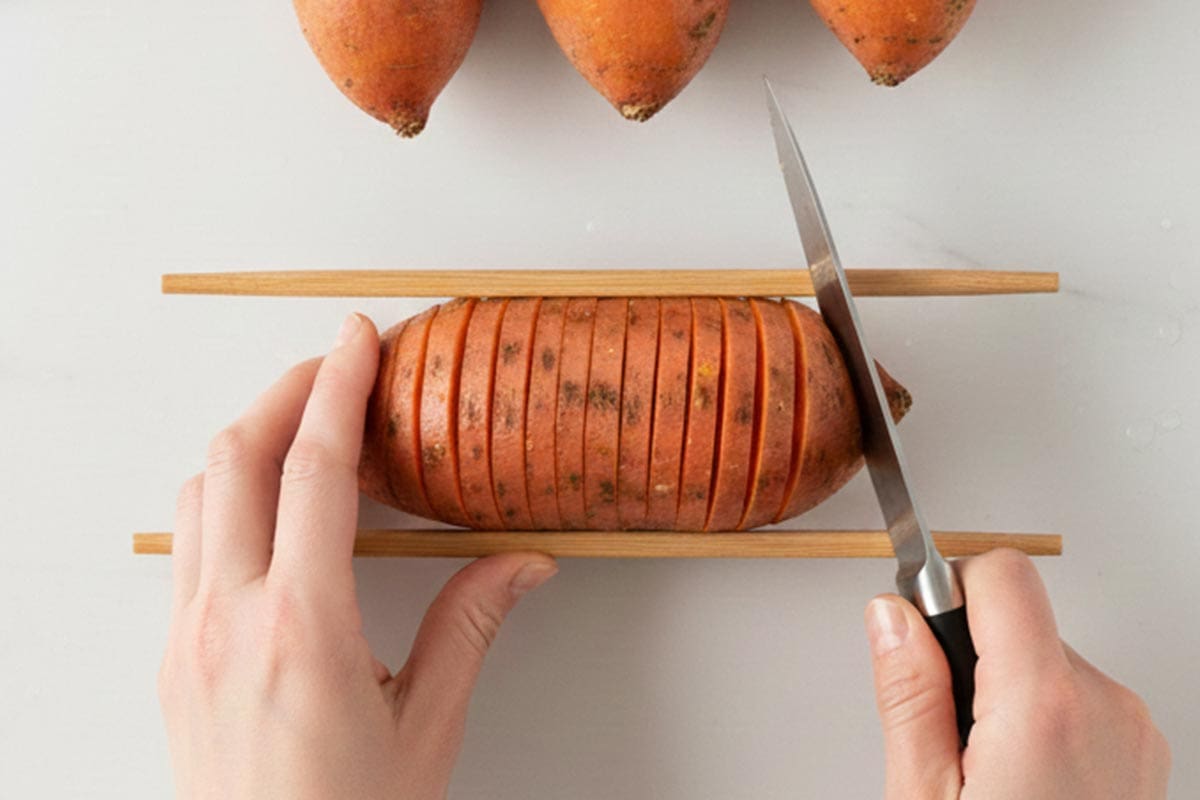
- Slice Hasselback Style: Using a sharp knife, cut thin 1/8-inch slices along the potato, stopping about ½ inch from the bottom so the base stays intact.
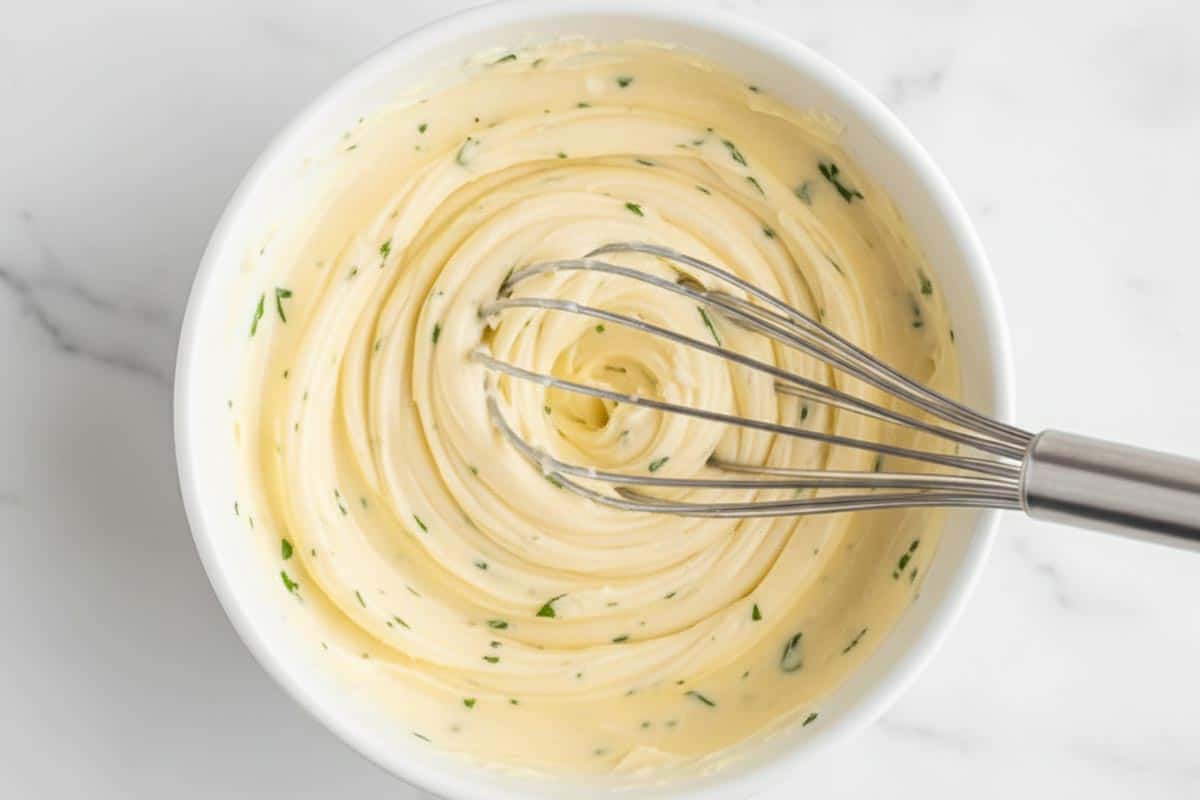
- Make the Garlic Butter Mixture: Melt the garlic butter and stir in lemon juice, thyme, rosemary, salt, and pepper until well combined. Set aside for brushing.
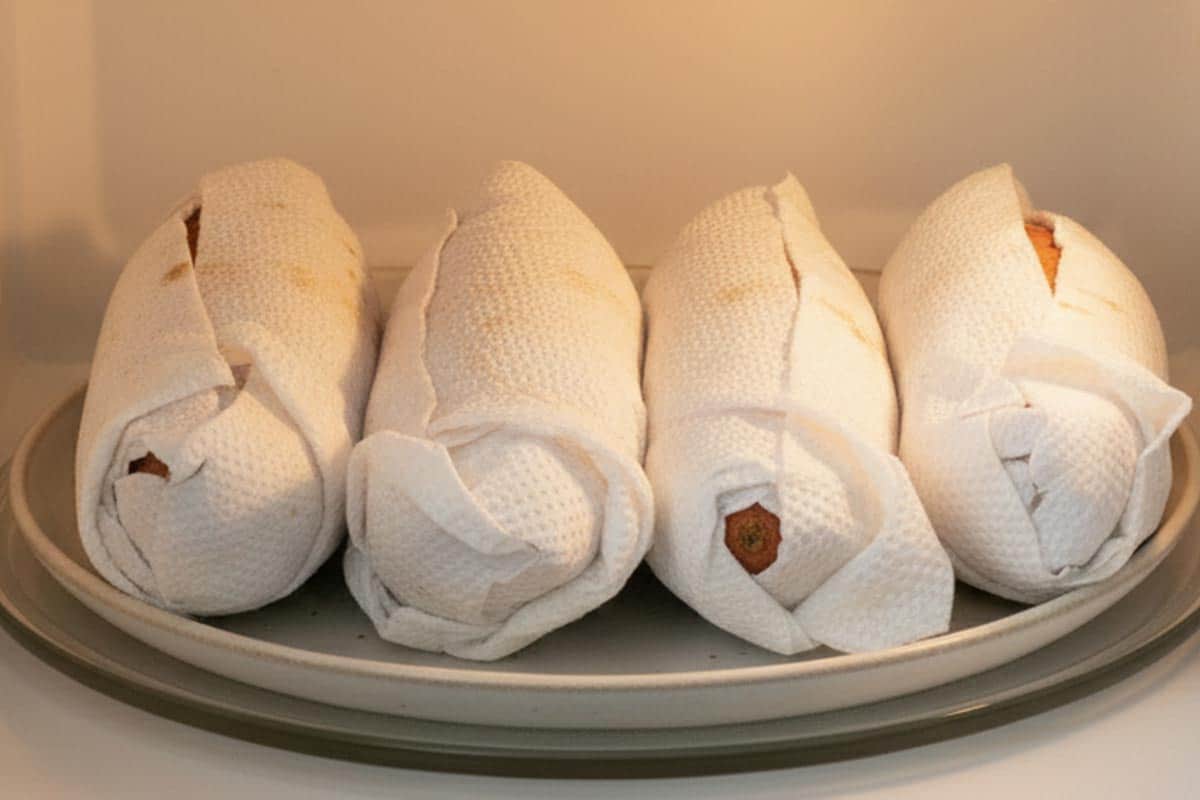
- Quick Microwave Method: Wrap each sweet potato in paper towel, place on a microwave-safe dish, and heat on high for 8–10 minutes until semi-soft.

- Brush and Roast (Quick Version): Carefully brush butter into the slices and over each potato. Transfer to the baking sheet and bake until golden.
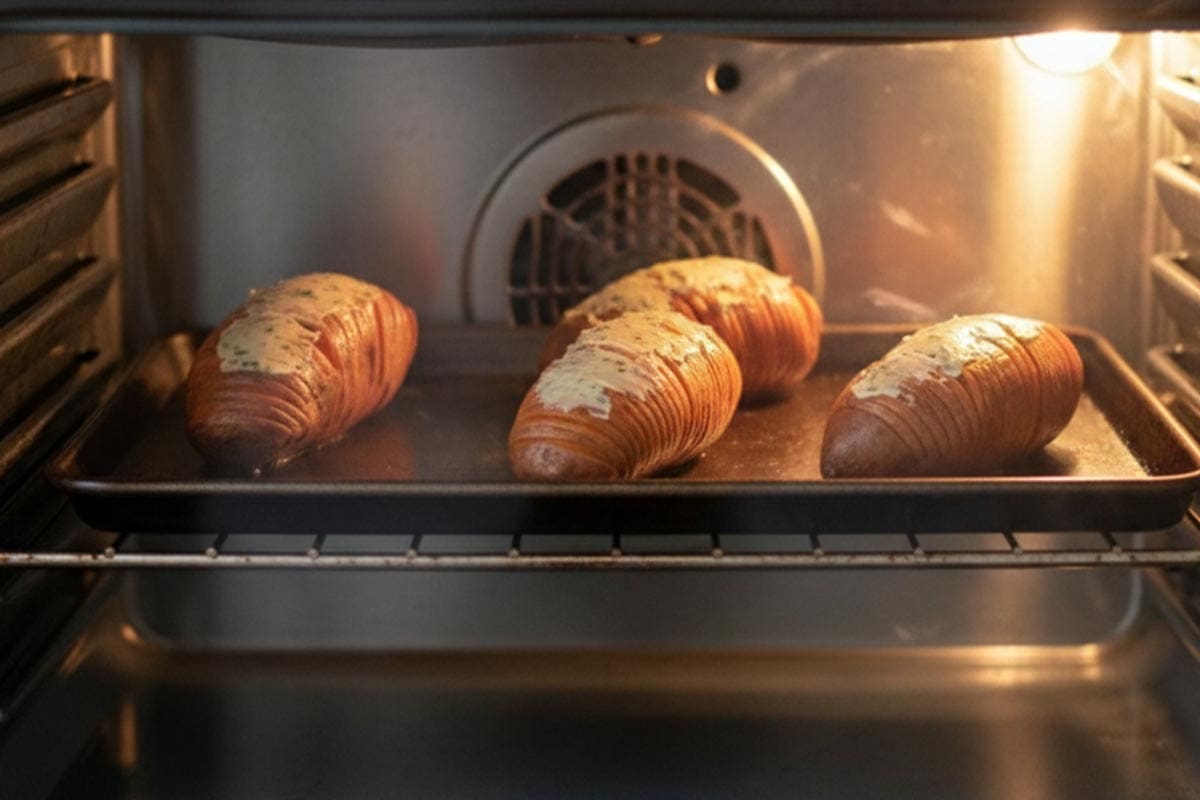
- Oven-Only: If skipping the microwave, brush potatoes with half the butter and roast for 30 minutes. Remove, fan open, brush with the remaining butter, and roast for another 30 minutes.

- Finish and Serve: Remove from the oven and brush once more with any remaining garlic butter. Garnish with fresh herbs or a sprinkle of salt before serving warm.
These Hasselback Sweet Potatoes are so flavorful they can easily stand on their own, but they’re even better alongside something hearty. Try them with Crispy Beer Roast Turkey for a satisfying dinner, or serve them next to a tender Sun-Dried Tomato Roast Lamb for a Sunday feast that feels extra special.
If you’re in the mood for comfort food, pair them with Beer Chicken with Mushroom Gravy and let all that buttery, herby flavor soak up the sauce. However you serve them, they’ll bring a touch of golden, garlicky perfection to any plate.
Tips For Making Hasselback Sweet Potatoes
- I like to place chopsticks on each side of the potato while slicing to stop the knife from going all the way through. It’s the easiest way to get those perfect Hasselback cuts.
- Try to pick potatoes that are roughly the same size so they bake evenly and stay soft inside while crisping up beautifully outside.
- Be generous with the garlic butter. I like brushing between the slices twice while roasting so every bit gets coated in flavor.
- For extra crunch, pop them under the broiler for a couple of minutes near the end. Just don’t walk away — they crisp up fast!
Place a chopstick or wooden spoon handle on each side of the potato before cutting. The knife will hit the chopsticks and stop before going all the way through.
Yes! You can slice and partially roast them a few hours ahead, then finish baking just before serving. Brush with a bit more butter to freshen them up.
They may have too much moisture. Make sure the potatoes are well dried before slicing, and avoid overcrowding the pan so they can roast properly.


Get afreeeBook!
IngredientsUSMetric1x2x3x
- ▢ 4 medium sweet potatoes
- ▢ 4 tablespoons Garlic Butter
- ▢ 1 tablespoon freshly squeezed lemon juice
- ▢ 1 teaspoon finely chopped fresh thyme leaves
- ▢ 1 teaspoon finely chopped rosemary
- ▢ 1 tablespoon salt and black pepper
- ▢ Extra herbs to garnish
Instructions
- Preheat the oven to 220°C | 425 degrees F. Line a baking tray/sheet with aluminum foil; set aside.
- Wash and scrub the sweet potatoes; pat them dry with paper towel. Carefully slice each sweet potato 1/8-inch slits (or slices) along the tops, stopping 1/2-inch from the bottom (1-cm). Be careful not to apply too much pressure or you may cut straight through.
- Prepare the Garlic Butter using this recipe . Melt the butter; mix the lemon juice, thyme, rosemary, salt and pepper (to taste) through the butter. Set aside.
The quicker version:
- Wrap each sweet potato in one sheet of paper towel; place on a microwave safe dish and microwave on high setting for 8-10 minutes, or until semi-soft. Brush the butter all over the potatoes and in between the slices; transfer them onto the baking sheet and place in the oven for a further 10 minutes to allow them to continue roasting and crisp up.
The slow version:
- Place potatoes onto the lined baking tray/sheet; brush with half of the butter and roast until the center of the potatoes are beginning to soften (30 minutes). Remove from oven, brush with the remaining butter and fan the wedges out lightly with a fork to open up the slices. Return to oven and continue baking for a further 30 minutes, or until soft and tender in the centre and crispy on the outside.
- Serve with this Crispy Beer Turkey , or this Sun-dried Tomato Roast Lamb , or this Beer Chicken with a Drunken Mushroom Gravy !
Notes
Nutrition
Nutrition information is automatically calculated, so should only be used as an approximation.

Hasselback Herbed Garlic Butter Sweet Potatoes
Ingredients
- 4 medium sweet potatoes
- 4 tablespoons Garlic Butter
- 1 tablespoon freshly squeezed lemon juice
- 1 teaspoon finely chopped fresh thyme leaves
- 1 teaspoon finely chopped rosemary
- 1 tablespoon salt and black pepper
- Extra herbs to garnish
Instructions
- Preheat the oven to 220°C | 425 degrees F. Line a baking tray/sheet with aluminum foil; set aside.
- Wash and scrub the sweet potatoes; pat them dry with paper towel. Carefully slice each sweet potato 1/8-inch slits (or slices) along the tops, stopping 1/2-inch from the bottom (1-cm). Be careful not to apply too much pressure or you may cut straight through.
- Prepare the Garlic Butter using this recipe . Melt the butter; mix the lemon juice, thyme, rosemary, salt and pepper (to taste) through the butter. Set aside.
The quicker version:
- Wrap each sweet potato in one sheet of paper towel; place on a microwave safe dish and microwave on high setting for 8-10 minutes, or until semi-soft. Brush the butter all over the potatoes and in between the slices; transfer them onto the baking sheet and place in the oven for a further 10 minutes to allow them to continue roasting and crisp up.
The slow version:
- Place potatoes onto the lined baking tray/sheet; brush with half of the butter and roast until the center of the potatoes are beginning to soften (30 minutes). Remove from oven, brush with the remaining butter and fan the wedges out lightly with a fork to open up the slices. Return to oven and continue baking for a further 30 minutes, or until soft and tender in the centre and crispy on the outside.
- Serve with this Crispy Beer Turkey , or this Sun-dried Tomato Roast Lamb , or this Beer Chicken with a Drunken Mushroom Gravy !
Notes
Nutrition
Thank You! https://cafedelites.com/hasselback-herbed-garlic-butter-sweet-potatoes-recipe/
Okay, can we all agree that Taco Tuesday is literally the best night of the week?! It’s my go-to for a fun, easy dinner that I know everyone will love. And since this year’s National Taco Day is happening on a Tuesday (Oct 7th!), we are going ALL out!
I’ve gathered my absolute best, most-loved Taco Tuesday ideas to make your next taco night a total knockout. We are not the only ones crazy about Taco Tuesday Old El Paso is declaring October 7 “ National Taco Day-Off ” and giving you a chance to win a trip to a Cowboy Ranch.
How to Make The Quickest Tacos
I know weeknights are crazy! You want an amazing Taco Tuesday, but you need it FAST. These are my secret weapons for getting delicious tacos on the table in under 30 minutes.
- Prep Ahead: Chop your lettuce, tomatoes, and onions in the morning or the night before. Store them in airtight containers in the fridge. When it’s time to eat, you just have to set them out!
- Use Smart Shortcuts: Don’t be afraid to use pre-shredded cheese, a bag of slaw mix, or a good quality store-bought pico de gallo or guacamole to save time. You can find pico de gallo in the refrigerated section, I love the one from Trader Joe’s . It’s known for being consistently fresh, chunky, and having a great flavor. My biggest tip for any store-bought pico is to drain off any extra liquid at the bottom of the container and give it a stir. If you want to make it taste homemade, add a quick squeeze of fresh lime juice and a little chopped cilantro. It makes all the difference!
- Cook The Meat in Batches: I love to cook a double batch of taco meat on Sunday. I use half for dinner that night and save the other half for Tuesday. It reheats in minutes and its good to store in an airtight container in the fridge for 3 to 4 days.
What to stuff in a Perfect Taco?
Building the perfect taco is an art, and it’s all about the layers! Here’s my guide to the essential components.
- The Tortilla: Choose your base! Flour tortillas are soft and pliable, great for over-stuffed tacos these are my personal favourite, I use the Tortilla Land uncooked flour tortillas. You find them in the refrigerated section and cook them in a hot pan for about 30 seconds per side. They puff up and taste incredible. Corn tortillas offer an authentic, slightly sweet flavor and are amazing when quickly charred on a gas stove or in a hot pan. Hard Shells give you that classic, satisfying crunch.
- The Protein: While the recipes below give you tons of options, don’t be afraid to mix it up! Pick from seasoned ground beef, shredded chicken, spicy chorizo, or black beans for a great veggie option.
- The Toppings (The Best Part!): Get creative with a taco bar! Set out bowls of lettuce, tomatoes, onions, cilantro, jalapeños, cheese, sour cream, salsa, and guacamole!
Our 10 Must-Make Taco Recipes
Now that you’re armed with all the pro tips, let’s get to the recipes!
Planning a bigger fiesta? Check out my Best New Year’s Eve Appetizers for more crowd pleasing bites that pair perfectly with tacos! Or downsize for a couples romantic date night menu ideas here.

Crispy Fish Tacos

Beef Mince Tacos (Better Than Takeout)

Viral Smash Burger Tacos

Easy Birria Tacos

Oven-Baked Barbecue Chicken ‘Pizza’ Tacos

Korean Bulgogi BBQ Beef Tacos

Slow Cooker Barbacoa Short Rib Tacos

Easy Taco Salad

Grilled Tequila Lime Chicken Taco Salad

The Only Salsa Recipe You’ll Ever Need

Pico De Gallo