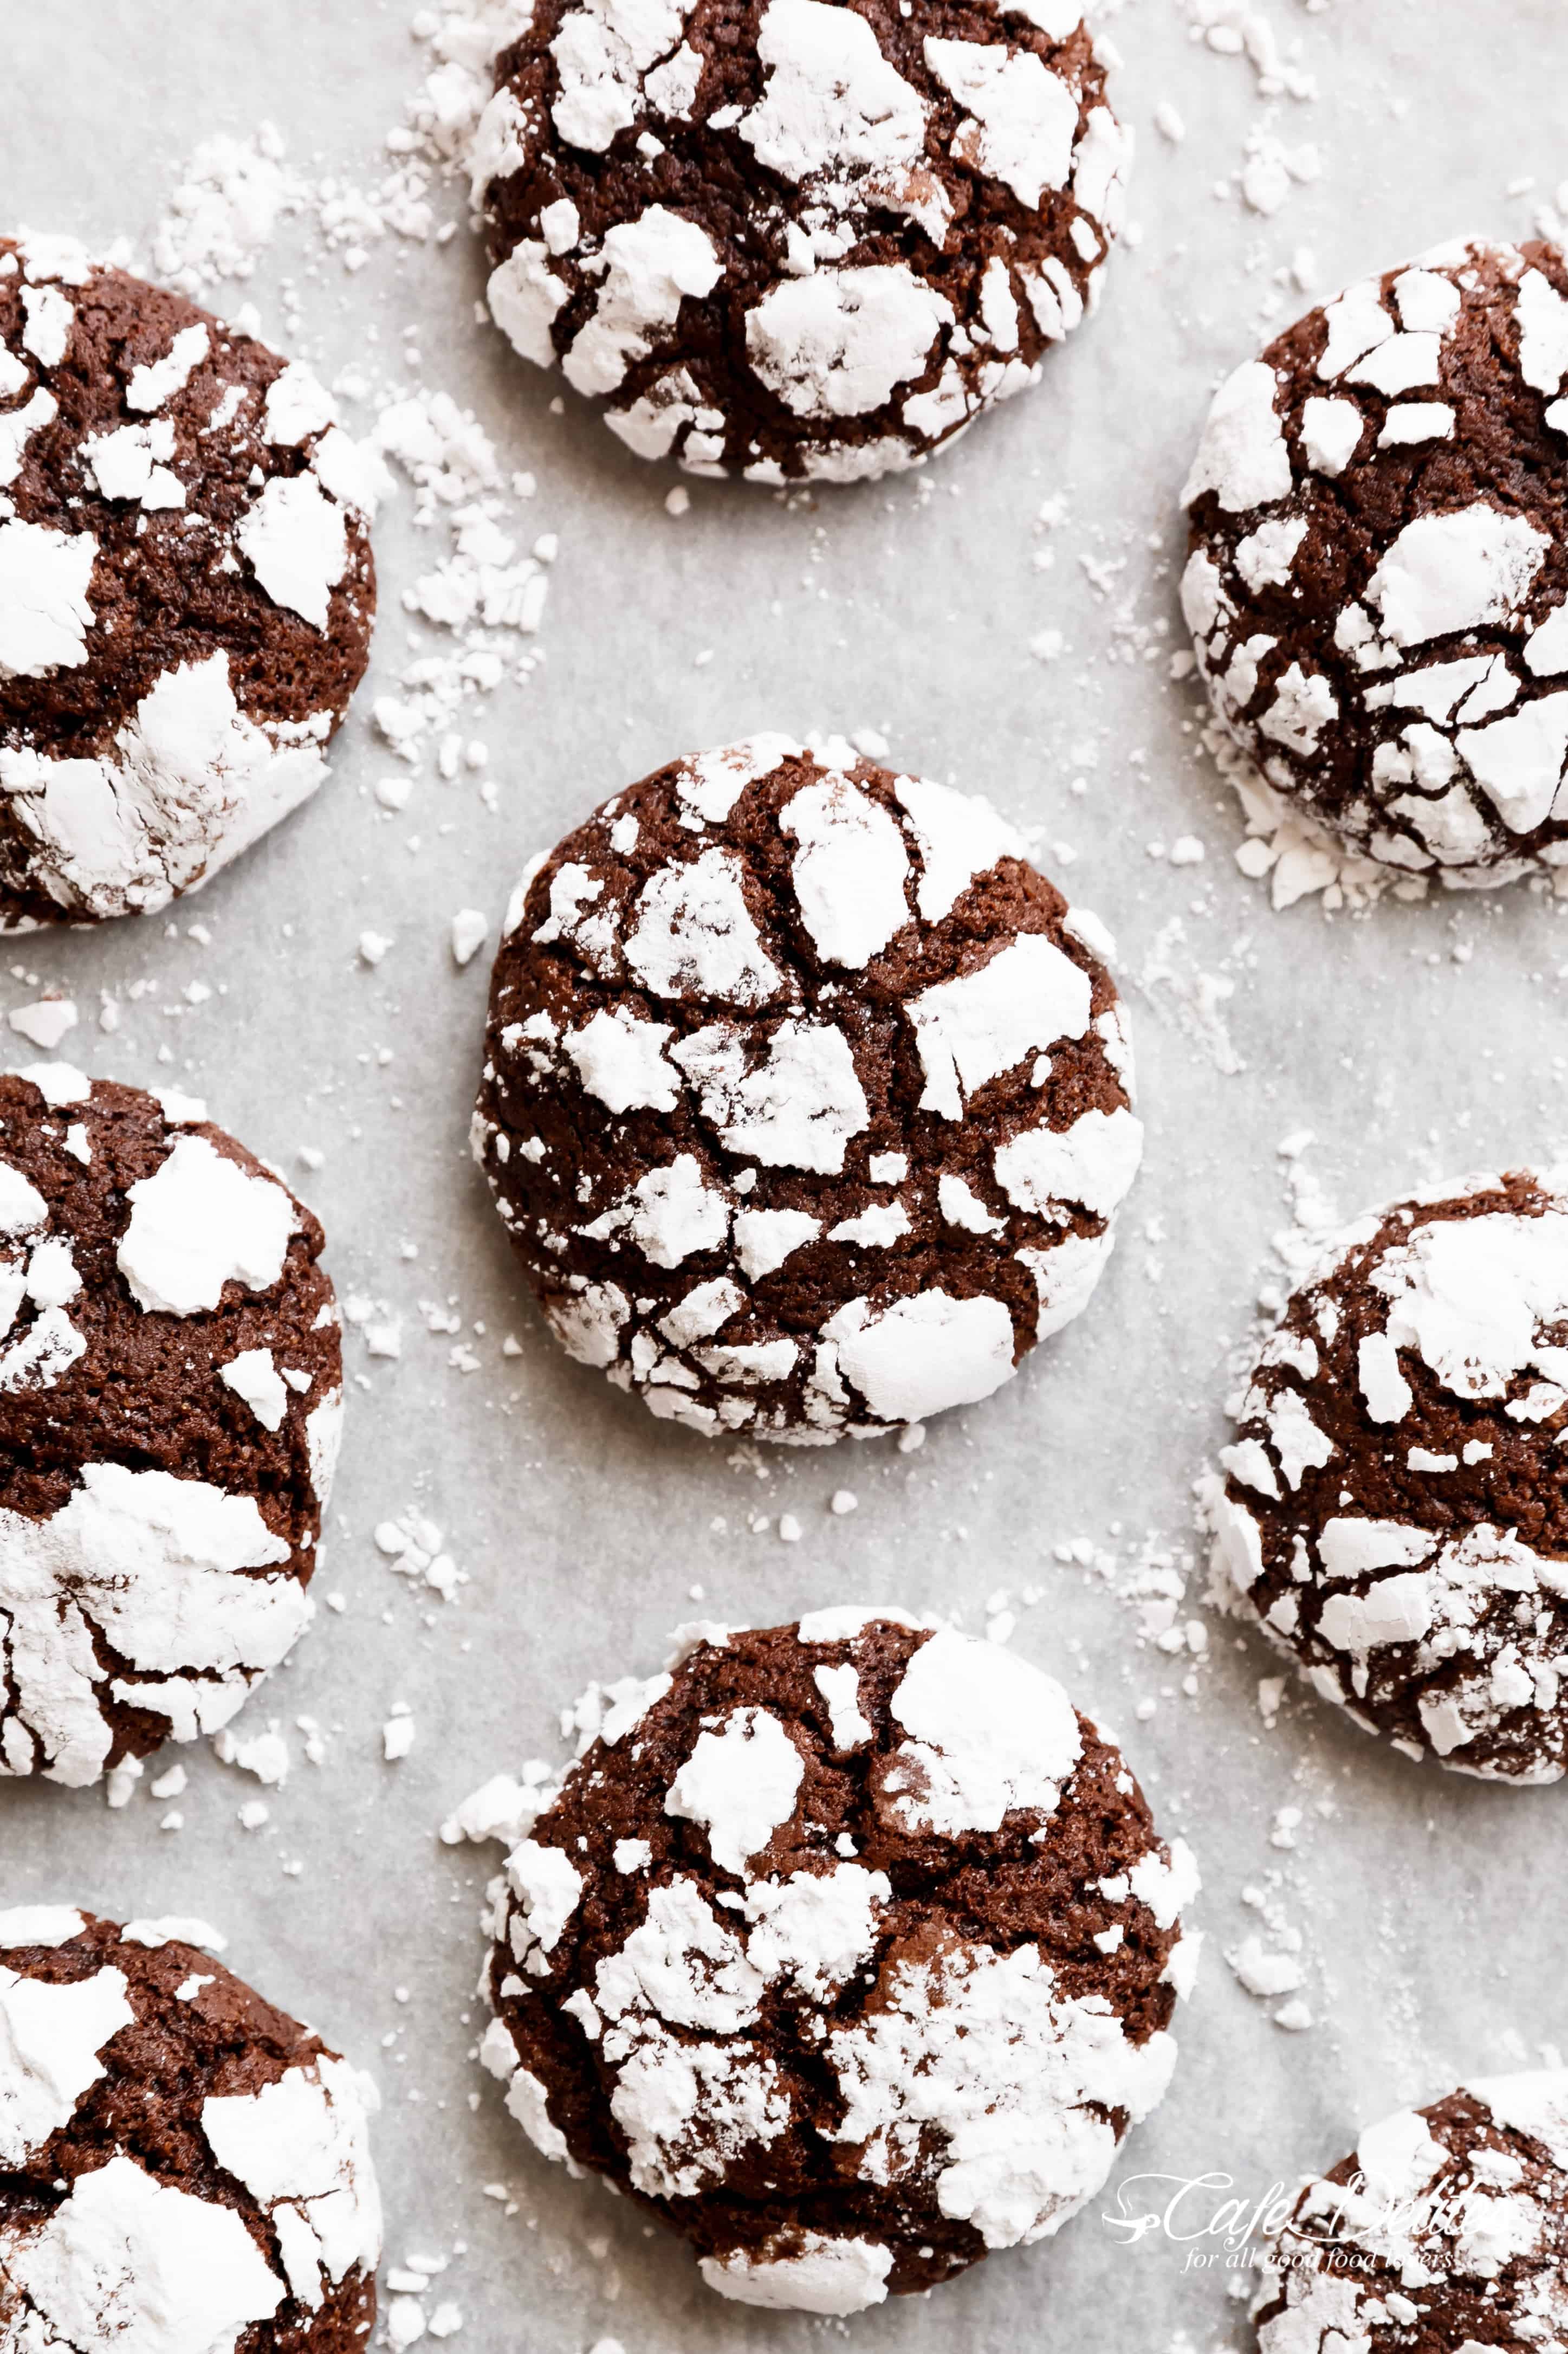
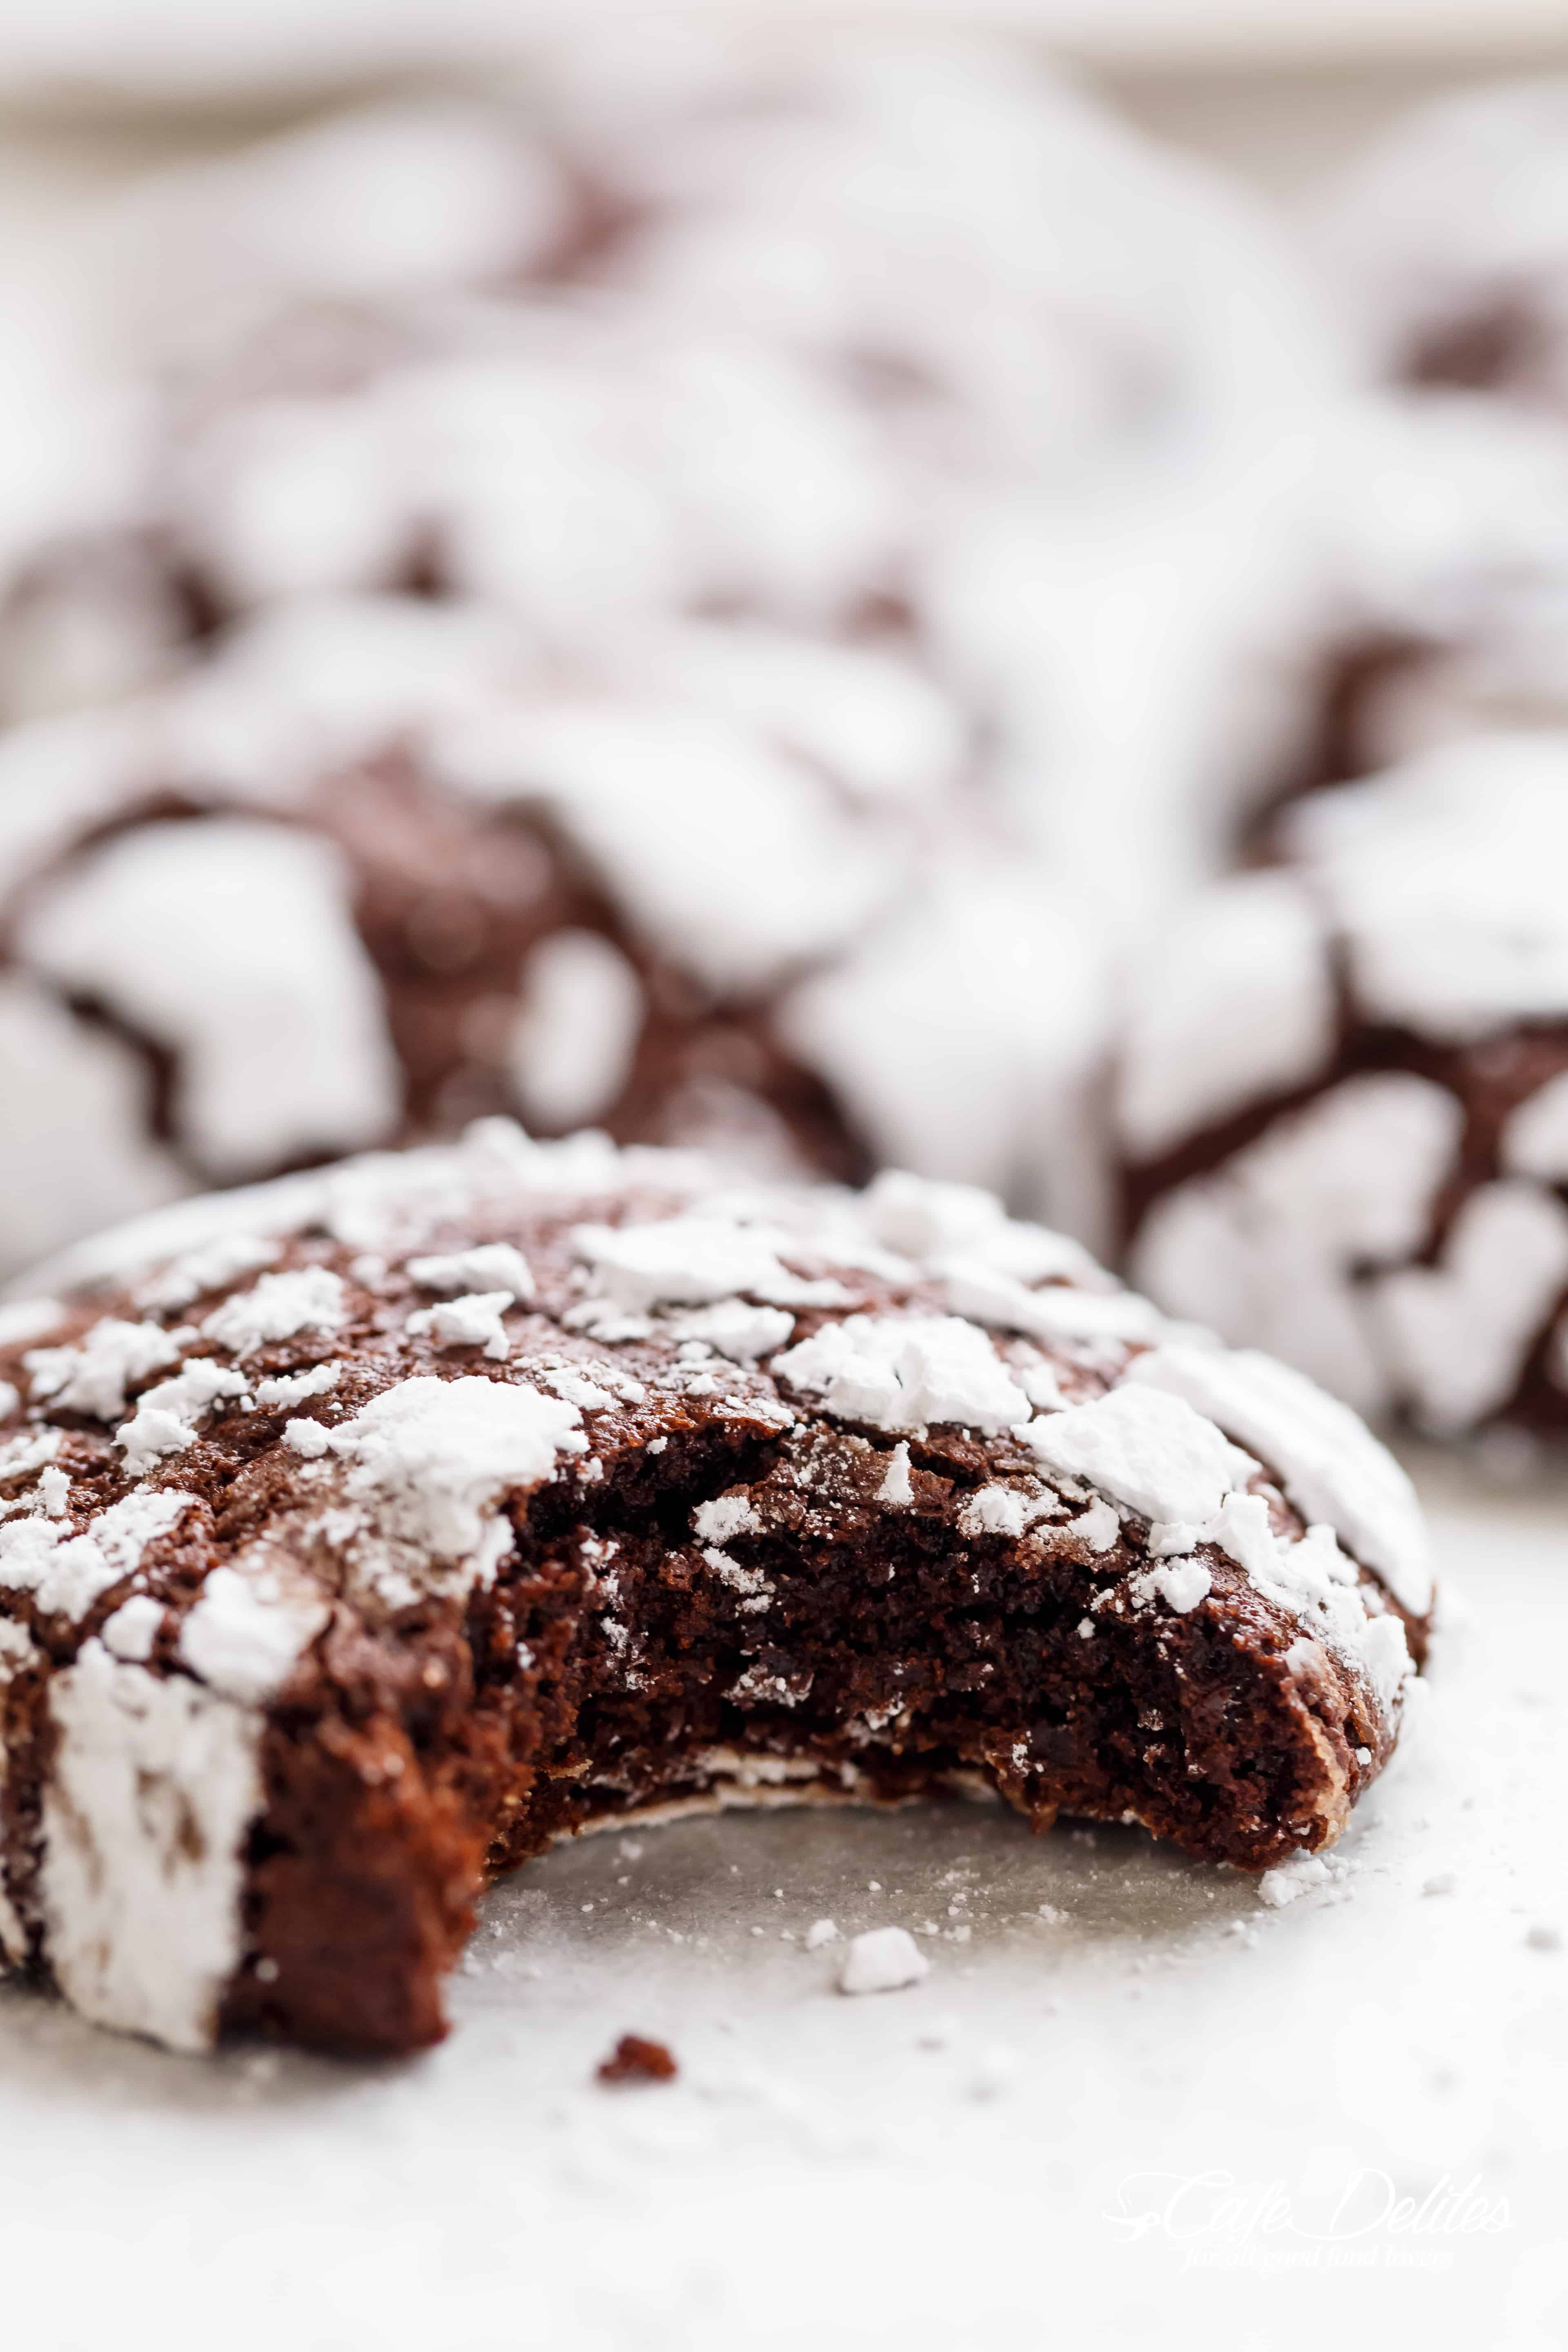
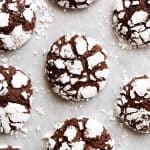
These Best Fudgy Chocolate Crinkle Cookies are essentially a rich, dark chocolate brownie masquerading as a cookie. After testing dozens of batches, I found that swapping the traditional butter for vegetable oil was the game changer. It creates a texture that stays impossibly soft, moist, and fudgy for days without drying out. With their signature snowy white cracked tops and gooey centers, these are the heavy hitters of every Christmas cookie exchange.
Take it from a brownie lover, these cookies are right next to my absolute favorite Ultimate Fudgy Chocolate Brownies .
- Why this Recipe Works
- What Goes into this Recipe
- How to Make Best Fudgy Chocolate Brownie Cookies
- Tips for Success
- Recipe FAQ’s
- Best Fudgy Chocolate Crinkle Cookies Recipe
Why this Recipe Works
If you’ve tried my classic Chocolate Chip Cookies or our Soft Peanut Butter Cookies , you’ll already know that I love a cookie with a gooey, cakey centre and perfect, crispy exterior.
I took my Best Fudgy Cocoa Brownies , played around with the measurements and finally nailed it. Texture is so important to me, especially when it comes to brownies and cookies. There’s nothing worse than craving a soft, gooey cookie but getting a dry, crumbly cookie instead! So, when my brain switched into high gear after a craving for chewy, soft, fudgy and crispy chocolate cookies kicked in, it was on like Donkey Kong!
Texture and richness aside, what’s the best thing about these cookies? They can be made using just one bowl! ONE BOWL PEOPLE. That means, no melting chocolate, no saucepans or pots, no waiting around chilling dough, no whipping yourselves into chaos beating eggs or egg whites.
What Goes into this Recipe
I’ve kept this ingredient list simple, using pantry staples you likely already have. However, the specific ratio of oil to flour is what guarantees that fudgy, brownie like center.

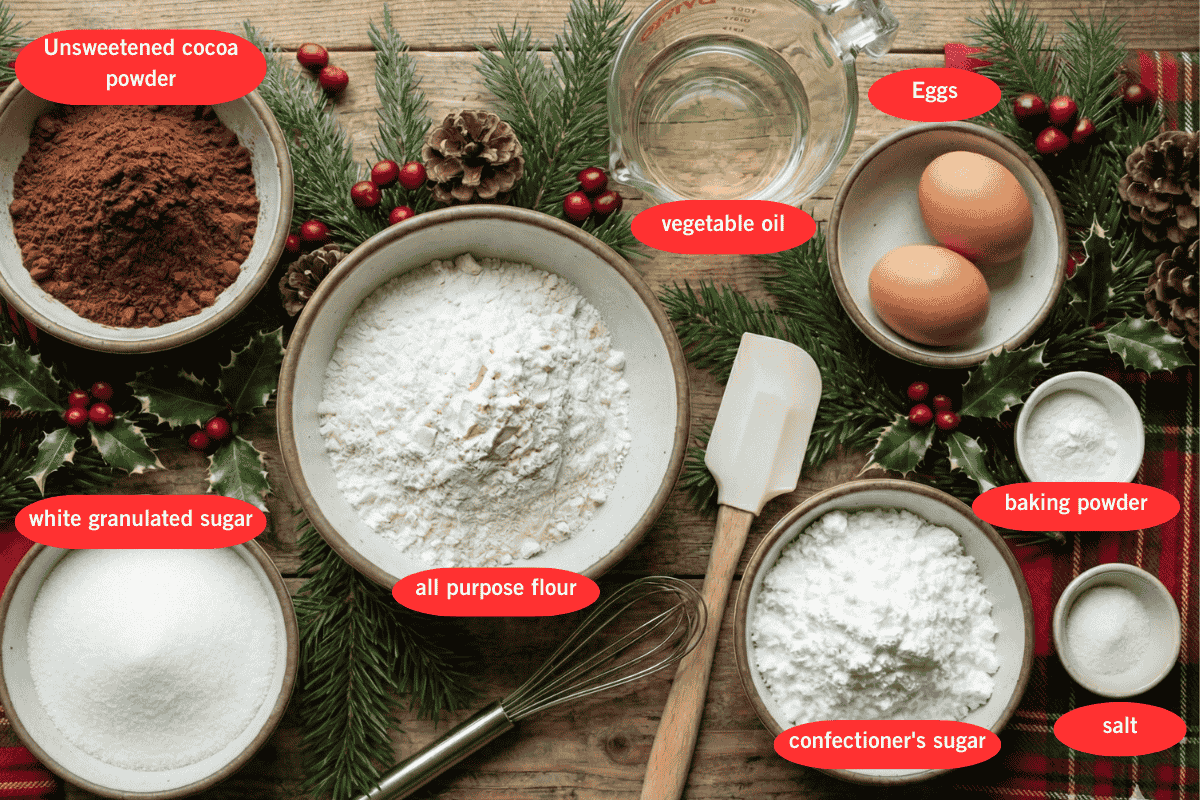
- Unsweetened Cocoa Powder: This provides the deep chocolate base. I recommend using a good quality regular unsweetened cocoa here (such as Hershey’s or Ghirardelli) rather than Dutch-process to ensure the acidity reacts correctly with the baking powder for the rise.
- White Granulated Sugar: Essential for two things, sweetening the bitter cocoa and creating the structure that allows the cracks to form.
- Vegetable Oil: The secret weapon. While I love butter, I found that using a neutral vegetable oil (like canola) keeps these cookies significantly moister and fudgier than butter-based versions. It also allows the chocolate flavor to shine without competition.
- All Purpose Flour: (Or plain flour). Spoon and level your flour so you don’t pack it down, otherwise, the cookies will be cakey rather than fudgy.
- Confectioner’s Sugar (Icing Sugar): For the coating. The contrast between the dark cookie and the white sugar is the signature Crinkle look.
Note: please see recipe card at the bottom for list of full ingredients and measurements
How to Make Best Fudgy Chocolate Brownie Cookies
I’ve broken this down to ensure you get that perfect crinkle every single time.
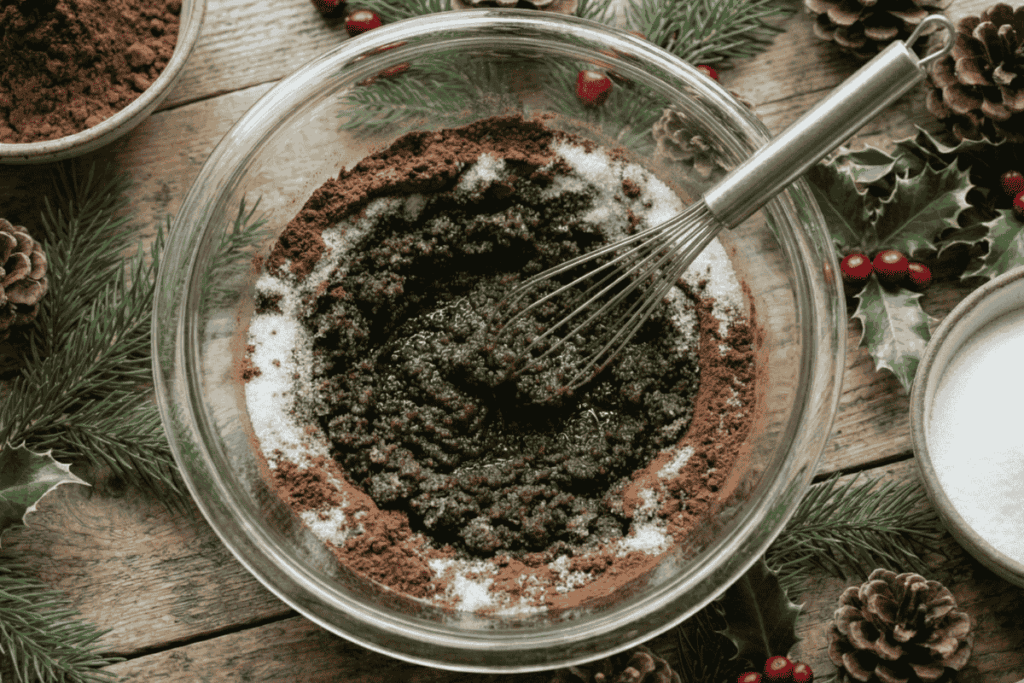
- Start by whisking the cocoa powder, white sugar, and vegetable oil in a medium bowl. It will look like wet sand at first but this is normal. Mixing the cocoa with the oil first helps bloom the chocolate flavor before the flour dilutes it.
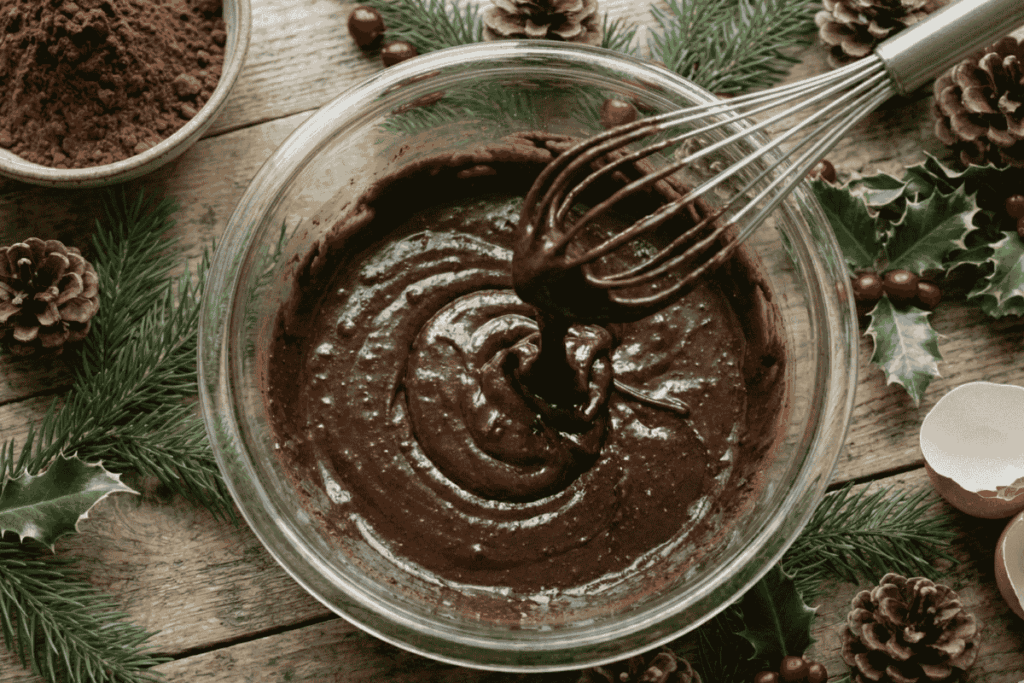
- Add the eggs one at a time, beating vigorously, then the vanilla. You’re not just mixing, you are looking for a transformation. The batter should turn glossy, shiny, and smooth. This protein structure is what creates the chewy brownie texture later.
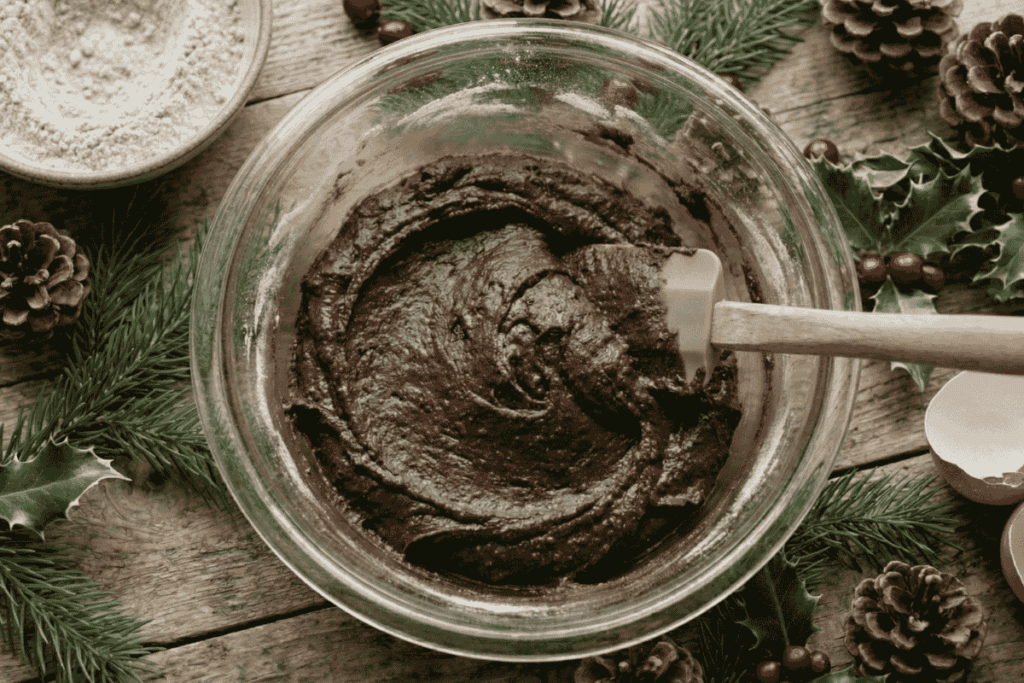
- In a separate bowl, whisk your flour, baking powder, and salt. Pour this into your wet mixture and stir just until the white streaks disappear. DO NOT overmix! If you overwork this dough, the gluten develops too much, and your cookies will be tough instead of fudgy.
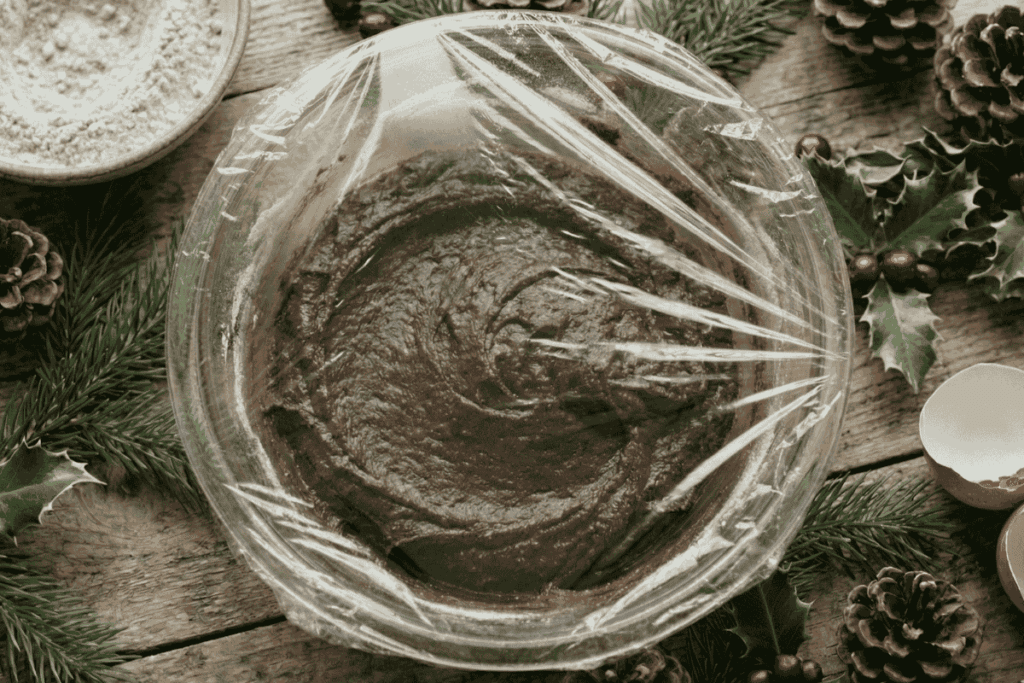
- Cover the bowl and refrigerate for at least 4 hours (or overnight). Since we are using oil instead of butter, the dough is very soft at room temperature. The cold solidifies the fat and hydrates the flour. If you bake them now, they will spread into flat puddles. Trust the process!

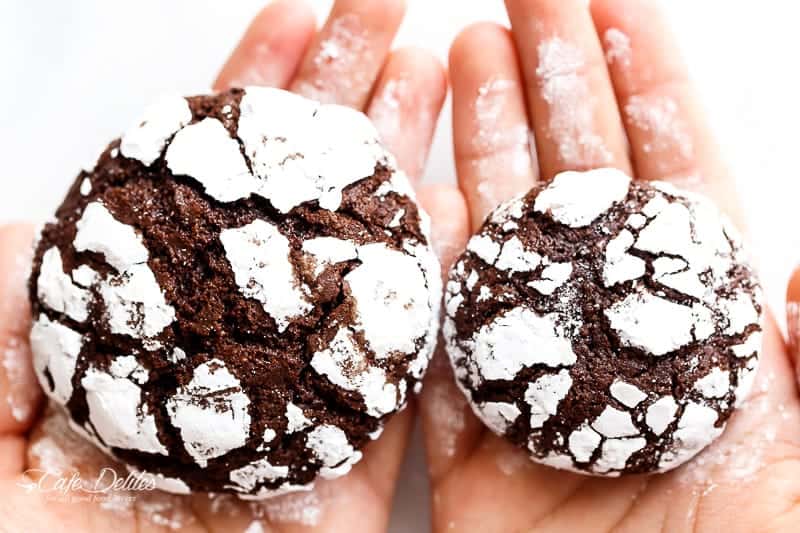
- Preheat your oven to 350°F (175°C). Line 2 cookie sheets or baking trays with parchment paper (baking paper). Scoop the cold dough (it will be sticky) and roll into balls. Roll them generously in the confectioner’s sugar. You want a thick white coat. As the cookie expands in the oven, the dark chocolate interior breaks through that heavy white shell, creating the dramatic contrast.
- Bake for 10 minutes (small cookies) or 12 minutes (large). They will look soft and slightly underbaked in the cracks. Take them out. They continue to cook on the hot tray for 5 minutes. If you bake them until they feel firm, they will be hard rock cookies once cooled.
Tips for Success
- Handle with Care (It’s Sticky!) Since this is an oil-based dough, it will be sticky even after chilling. I find it easiest to use a spring-loaded cookie scoop to drop the dough directly into the bowl of icing sugar. Only use your hands once it’s coated to roll it into a perfect ball.
- The Snowball Effect . Don’t shake off the excess sugar! You want a thick, heavy coat of confectioner’s sugar on the outside. If the coating is too thin, the sugar will melt into the dough while baking and disappear.
- Avoid Flat Cookies . If your kitchen is hot or the dough has been sitting out while you rolled the first batch, put the baking sheet back in the fridge for 10 minutes before sliding it into the oven. Cold dough hits hot air gives a perfect lift. Warm dough hits hot air and you will get flat pancakes.
- The Slice of Bread Trick . These cookies stay soft for days, but if you live in a dry climate, store them in an airtight container with a slice of white bread. The cookies will absorb the moisture from the bread and stay fudge-soft (just throw the bread away after a day).
- Festive Twist If you’re making these for Christmas, try adding ½ teaspoon of peppermint extract with the vanilla, or mix a pinch of cinnamon into the sugar coating for a Mexican Hot Chocolate vibe.
Make sure you make and serve these best fudgy chocolate brownie cookies at a party or a get-together you’re hosting- you’re sure to get rave reviews. Team them up with appetizers like Sausage Rolls , Classic Deviled Eggs , Crispy Baked Buffalo Wings and some Pineapple Rum Punch .
This almost always happens because the dough was too warm. Since we use oil instead of butter, the dough relies heavily on being cold to hold its shape. Ensure you chilled it for the full 4 hours. If your kitchen is warm, pop the rolled balls back in the fridge for 10 minutes before baking.
Yes! This is a great make-ahead recipe. You can keep the dough covered in the fridge for up to 2 days before rolling. To freeze, roll the dough into balls (without sugar) and freeze them on a tray. When ready to bake, let them thaw for 20 minutes, roll in sugar, and bake.
You likely overbaked them. It is crucial to pull these out of the oven when they still look soft and slightly underdone in the center. They set as they cool. Even 2 extra minutes in the oven can turn a fudgy brownie center into a crunchy biscuit.
Get afreeeBook!
IngredientsUSMetric1x2x3x
- ▢ 1/2 cup unsweetened cocoa powder
- ▢ 1 cup white granulated sugar
- ▢ 1/4 cup vegetable oil
- ▢ 2 large eggs
- ▢ 2 teaspoons pure vanilla extract
- ▢ 1 cup all purpose or plain flour
- ▢ 1 teaspoon baking powder
- ▢ 1/2 teaspoon salt
- ▢ 1/4 cup confectioner’s sugar or icing sugar, for coating
Instructions
- In a medium-sized bowl, mix together the cocoa powder, white sugar and vegetable oil. Beat in eggs one at a time, until fully incorporated. Mix in the vanilla.
- In another bowl, combine the flour, baking powder, and salt. Stir the dry ingredients into the wet mixture just until a dough forms (do not over beat). Cover bowl with wrap and refrigerate for at least 4 hours or overnight.
- When ready to bake, preheat oven to 350°F | 175°C. Line 2 cookie sheets or baking trays with parchment paper (baking paper). Roll 1 tablespoonful of dough into balls for smaller cookies, or 2 tablespoonfuls for larger cookies.
- Add the confectioners (icing) sugar to a smaller bowl. Generously and evenly coat each ball of dough in confectioners’ sugar and place onto prepared cookie sheets.
- Bake in preheated oven for 10 minutes (for small cookies) or 12 minutes (for larger cookies). The cookies will come out soft from the oven but will harden up as they cool.
- Allow to cool on the cookie sheet for 5 minutes before transferring to wire racks to cool.
Notes
- Dough Texture This dough is naturally sticky because it uses oil instead of butter. This is normal! Do not add extra flour, or the cookies will become dry. If the dough becomes too sticky to handle while rolling, place the bowl back in the fridge for 15–20 minutes to firm up again.
- The Crinkle Secret Roll the dough balls generously in the confectioner’s sugar. Do not shake off the excess! You need a thick, heavy coating to ensure the sugar stays white and creates that dramatic contrast as the cookie expands and cracks.
- Do Not Overbake This is the most important step for a fudgy center. Remove the cookies from the oven when the edges are set but the cracks still look soft and slightly underbaked. They will continue to firm up on the hot baking sheet as they cool.
- Make Ahead The dough can be prepared and kept covered in the refrigerator for up to 3 days before baking. In fact, the flavor often improves after sitting!
- Freezing The Dough Roll the dough into balls (do not coat in sugar yet) and freeze them on a baking sheet until solid. Transfer to a ziplock bag and freeze for up to 2 months. Thaw on the counter for 20 minutes, roll in sugar, and bake as directed.
- Storage Baked cookies stay fresh in an airtight container at room temperature for 4 to 5 days .
Nutrition
Nutrition information is automatically calculated, so should only be used as an approximation.
Best Fudgy Chocolate Crinkle Cookies
Ingredients
- 1/2 cup unsweetened cocoa powder
- 1 cup white granulated sugar
- 1/4 cup vegetable oil
- 2 large eggs
- 2 teaspoons pure vanilla extract
- 1 cup all purpose or plain flour
- 1 teaspoon baking powder
- 1/2 teaspoon salt
- 1/4 cup confectioner’s sugar or icing sugar, for coating
Instructions
- In a medium-sized bowl, mix together the cocoa powder, white sugar and vegetable oil. Beat in eggs one at a time, until fully incorporated. Mix in the vanilla.
- In another bowl, combine the flour, baking powder, and salt. Stir the dry ingredients into the wet mixture just until a dough forms (do not over beat). Cover bowl with wrap and refrigerate for at least 4 hours or overnight.
- When ready to bake, preheat oven to 350°F | 175°C. Line 2 cookie sheets or baking trays with parchment paper (baking paper). Roll 1 tablespoonful of dough into balls for smaller cookies, or 2 tablespoonfuls for larger cookies.
- Add the confectioners (icing) sugar to a smaller bowl. Generously and evenly coat each ball of dough in confectioners’ sugar and place onto prepared cookie sheets.
- Bake in preheated oven for 10 minutes (for small cookies) or 12 minutes (for larger cookies). The cookies will come out soft from the oven but will harden up as they cool.
- Allow to cool on the cookie sheet for 5 minutes before transferring to wire racks to cool.
Notes
- Dough Texture This dough is naturally sticky because it uses oil instead of butter. This is normal! Do not add extra flour, or the cookies will become dry. If the dough becomes too sticky to handle while rolling, place the bowl back in the fridge for 15–20 minutes to firm up again.
- The Crinkle Secret Roll the dough balls generously in the confectioner’s sugar. Do not shake off the excess! You need a thick, heavy coating to ensure the sugar stays white and creates that dramatic contrast as the cookie expands and cracks.
- Do Not Overbake This is the most important step for a fudgy center. Remove the cookies from the oven when the edges are set but the cracks still look soft and slightly underbaked. They will continue to firm up on the hot baking sheet as they cool.
- Make Ahead The dough can be prepared and kept covered in the refrigerator for up to 3 days before baking. In fact, the flavor often improves after sitting!
- Freezing The Dough Roll the dough into balls (do not coat in sugar yet) and freeze them on a baking sheet until solid. Transfer to a ziplock bag and freeze for up to 2 months. Thaw on the counter for 20 minutes, roll in sugar, and bake as directed.
- Storage Baked cookies stay fresh in an airtight container at room temperature for 4 to 5 days .
Nutrition
Thank You! https://cafedelites.com/fudgy-chocolate-crinkle-cookies/
Okay, can we all agree that Taco Tuesday is literally the best night of the week?! It’s my go-to for a fun, easy dinner that I know everyone will love. And since this year’s National Taco Day is happening on a Tuesday (Oct 7th!), we are going ALL out!
I’ve gathered my absolute best, most-loved Taco Tuesday ideas to make your next taco night a total knockout. We are not the only ones crazy about Taco Tuesday Old El Paso is declaring October 7 “ National Taco Day-Off ” and giving you a chance to win a trip to a Cowboy Ranch.
How to Make The Quickest Tacos
I know weeknights are crazy! You want an amazing Taco Tuesday, but you need it FAST. These are my secret weapons for getting delicious tacos on the table in under 30 minutes.
- Prep Ahead: Chop your lettuce, tomatoes, and onions in the morning or the night before. Store them in airtight containers in the fridge. When it’s time to eat, you just have to set them out!
- Use Smart Shortcuts: Don’t be afraid to use pre-shredded cheese, a bag of slaw mix, or a good quality store-bought pico de gallo or guacamole to save time. You can find pico de gallo in the refrigerated section, I love the one from Trader Joe’s . It’s known for being consistently fresh, chunky, and having a great flavor. My biggest tip for any store-bought pico is to drain off any extra liquid at the bottom of the container and give it a stir. If you want to make it taste homemade, add a quick squeeze of fresh lime juice and a little chopped cilantro. It makes all the difference!
- Cook The Meat in Batches: I love to cook a double batch of taco meat on Sunday. I use half for dinner that night and save the other half for Tuesday. It reheats in minutes and its good to store in an airtight container in the fridge for 3 to 4 days.
What to stuff in a Perfect Taco?
Building the perfect taco is an art, and it’s all about the layers! Here’s my guide to the essential components.
- The Tortilla: Choose your base! Flour tortillas are soft and pliable, great for over-stuffed tacos these are my personal favourite, I use the Tortilla Land uncooked flour tortillas. You find them in the refrigerated section and cook them in a hot pan for about 30 seconds per side. They puff up and taste incredible. Corn tortillas offer an authentic, slightly sweet flavor and are amazing when quickly charred on a gas stove or in a hot pan. Hard Shells give you that classic, satisfying crunch.
- The Protein: While the recipes below give you tons of options, don’t be afraid to mix it up! Pick from seasoned ground beef, shredded chicken, spicy chorizo, or black beans for a great veggie option.
- The Toppings (The Best Part!): Get creative with a taco bar! Set out bowls of lettuce, tomatoes, onions, cilantro, jalapeños, cheese, sour cream, salsa, and guacamole!
Our 10 Must-Make Taco Recipes
Now that you’re armed with all the pro tips, let’s get to the recipes!
Planning a bigger fiesta? Check out my Best New Year’s Eve Appetizers for more crowd pleasing bites that pair perfectly with tacos! Or downsize for a couples romantic date night menu ideas here.

Crispy Fish Tacos

Beef Mince Tacos (Better Than Takeout)

Viral Smash Burger Tacos

Easy Birria Tacos

Oven-Baked Barbecue Chicken ‘Pizza’ Tacos

Korean Bulgogi BBQ Beef Tacos

Slow Cooker Barbacoa Short Rib Tacos

Easy Taco Salad

Grilled Tequila Lime Chicken Taco Salad

The Only Salsa Recipe You’ll Ever Need

Pico De Gallo